What is the best DAW for schools? Continued…

A few weeks ago I wrote a blog post saying why I think Presonus Studio One Free is the best DAW (recording software) for high school teachers and students to use.

Well… such is the ever-changing nature of technology that I’m having to possibly change my mind.

In the last few hours at NAMM Avid has announced a new piece of software as part of their Pro Tools range, Pro Tools First.

Pro Tools is the industry standard DAW – everyone uses it.  But I advised against using it in schools as it was always too expensive, even the ‘student’ version.  What is different about Pro Tools First though is that it is FREE!  It will have limitations (such as only being able to have 16 audio tracks and can only record up to four at once, which may make it difficult recording drums in some circumstances) but it will do pretty much everything students will need of it.

It has software instruments for using MIDI, plugins such as EQ, Compression, Reverb, Delay, etc and many of the same recording, editing and mixing features as the pro version of Pro Tools.

It has not been released yet but as soon as it has I’ll do a full review of it and how useful it will be to high school teachers and students.

For my New Zealand customers it is likely I’ll produce new tutorial videos and documents for my MUSTEC 27656 and 27658 Unit Standard resources based on this new software (these will be available as a free update).

If you’re a teacher who has been using Studio One Free don’t feel you have to change to anything else.  If it works for you and it helps your students to learn how to record and mix keep using it.  Just because a new piece of software has been released doesn’t mean Studio One has become any less capable.

Probably the main reason I’m excited about this is that it brings back memories of using PT Free back in the early 2000’s on a class set of Windows 98 computers.  That was a great solution for teaching but as Digidesign never updated it for Windows XP or OSX I’ve always been looking for other solutions.

So… I’ll keep you posted on this potentially exciting development for teaching recording and mixing in schools.

Duncan

Project Based Learning in Music

This year my year 13 music class is going to focus less on assessment and more on developing the craft to produce great art.

The focus for my students will be on choosing a project that will be the focus of their year’s work… Project Based Learning. They will come up with a project that interests them but it may be something like:

  • Making an EP or CD
  • Recording a series of concerts and posting them to YouTube
  • Composing and recording the music for a film in the 48 hour film festival.
  • Or anything else they can think of.

As I go through the year I’m going to document the progress of my students so other teachers will be able to see the process in action and decide if this method of teaching and learning is right for their students.

Summertime preplanning

Over the last 12 years I’ve been running a business (www.learningideas.co.nz) in which I develop resources specifically for the NZ music education system. All of these resources I’ve developed with little input from others, and while I’m very happy with what I’ve produced (as are most of my customers) I’ve always seen areas where they could be improved. It’s occurred to me many times that if I collaborated more with others, then my resources would be of far higher quality.

The most important qualities I hope to develop in my students are a spirit of innovation and collaboration. I see these as far more important than developing any specific musical knowledge or skills. Therefore, it makes great sense that as I seek to develop a PBL course for my students I collaborate with someone highly skilled, and in doing so become a good model for my students.

I’m incredibly fortunate to have the highly knowledgeable, skilled and experienced Ginnie Thorner (@ginippi) help with me the development of this course.

This is my first piece of advice to other teachers wanting to develop a PBL course for their students. Find someone in your school who is like-minded and is willing to kick around ideas.

Where I’ve got so far…

The biggest concern I have with PBL is making sure that my students are motivated and focused right throughout the year, particularly during their busy periods in term 3 and 4. So to make sure they are inspired, choose their project well and come up with a realistic and effective timeline of work for the year I need to make sure I plan the first 2-3 weeks very carefully.

The following are what we are going to attempt at the start of the year before they start working on their projects:

  • Organise ‘creative’ industry professionals to come in and talk to the students – it doesn’t really matter what part of the music industry these people will come from. What is important is they are actively working in the industry and can share with my students about their successes and failures, challenges and where they get their inspiration.
  • Visit local theatres, studios and galleries – take the students on a field trip into the city where art (not necessarily just music) is being created. Try to expand their horizons for the possibility of what they can do for their project.
  • Have each student setup a blog – for every visitor and field trip students will need to document their reflections. They will be required to write in their blog every week, providing evidence of their learning and progress.  At our school this year we are increasing our use of Microsoft OneNote and Evernote so these may be good alternatives to maintaining a blog.
  • Create an ‘Inspiration Wall’ – we’ll setup a physical wall in our classroom where students are required to post anything they find inspiration from. It could be magazine articles, posters, art, etc. We may also setup an online version on our class Moodle page for sharing YouTube clips. Students will also post what they are up to, what they are trying to do, what their challenges are, etc. It’s really important students inspire each other and know where each other is at so they can collaborate and assist each other.
  • Setup a timeline for reviews and progress reports – at this stage we’re setting up eight dates throughout the year that students must report back to me about their progress. In preparation for their interviews they need to do blog posts along the following lines (thanks @ginippi for this list):

Post 1 – My plan. What I think I might do.

                       Why did you choose this?

                       What is most exciting about this project?

                       What are you looking forward to?

Post 2 – Progress after 4 weeks

                       First steps.

What have you done?

What needs to be done?

Has the project idea changed / why or why not.

                       One person that has inspired me ….

Post 3 – These holidays I am going to …

                       OR… I am so brilliant – look what I have done.

Post 4 – Half way there.

                       My most urgent task is to …

                       What I am finding frustrating is

                       At check in I agreed to 

Post 5 – One term to go….

                       These holidays I will …

                       Why did I agree to this?

                       The person who I am grateful to is…    

Post 6 – What I did in my holidays

Post 7  Nearly there. So much to do.

                       Biggest concerns / pressures at the moment

Post 8  I am most proud of

                       What I hope the “audience” notice

                       My best advice to someone doing this is …

                       What have I learnt about: music, creative projects, myself as a contributor to the work, etc

  • Setup a course of learning about recording and mixing – as the majority of this particular class will be wanting to use technology in some way I will be getting them to complete a mixing course from Weathervane Music (in addition to using my own workbooks from learningideas.co.nz)

What next?

I’m now a week or so away from seeing students. I’m aware of making sure I don’t ‘over-plan’ as I know that once I start working with students things will change (although this could be me being lazy!). I think this will need to be a fluid process and I need to be adaptable to student and project requirements.

Hopefully for my next blog on this topic I’ll be able to report back about what projects students have chosen and how our planning for the year is going.

How to mix… a guide for high school teachers – part two

In my last blog post I demonstrated a good starting point for teaching students how to mix.

After six weeks or so of having my students mixing using only faders, panning and EQ (on a few projects) I then start to discuss the overall picture of the mix process.  Advanced students would be required to purchase the excellent Mike Senior book on mixing on Kindle in addition to reading other articles online and visiting blog posts like soundscoop (and a multitude of others).

Many recording equipment manufacturers like Universal Audio, AVID, Presonus and many others also offer excellent mixing tutorials and students are encouraged to complete as many of these as possible.  However, while we all have some motivated and diligent students, we’re always going to have several that need a little more ‘spoon-feeding’ (which of course we always try to ‘wean’ them off as good parents/teachers should!).  It would be great if all students went to these websites and started teaching themselves (which undoubtedly some students will) but for others I’ve done a few guides that may help.

NZ Music Technology teachers will be familiar with my resources from http://www.learningideas.co.nz and these are excellent guides specifically tailored to the NZQA assessment system.  A resource I wrote several years ago (which was hugely influenced by the excellent book The Mixing Engineers Handbook by Bobby Owsinski from Mix Books) which I gave away free to NZ teachers can be downloaded here. It basically goes through the stages of mixing and can be summed up like this (but keep in mind there is no one way to mix as every mix and mixing engineer is different – but this is good for newbies):

  1. Balance the faders
  2. Pan the tracks to create a stereo image (although some engineers, particularly if mixing for a live PA system will choose to mix in mono for various reasons)
  3. Use EQ to give each instrument it’s own space in the overall frequency range of the track.  You can think of it like this:
    Screen Shot 2015-01-10 at 9.32.40 am
    (I got this image off the http://www.harmonycentral.com website many years ago and have not been able to find the page for it again so sorry I’m unable to give proper credit to the person that created it).
  4. Use compression on some instruments to reduce the dynamic range to create a more stable volume balance between the instruments (but in many instances it’s more appropriate to use compression before EQ, or before and after, or use multiple compressors… it gets quite complicated really!)
  5. Add ambience with reverb and/or delay.  Note, it’s best to try and get this naturally by recording in a very nice room with good acoustics.  But if this isn’t possible then record the tracks as ‘dry’ as possible and add ambience in your DAW.
  6. Add interest.  All of the above just serves the purpose of making sure you can achieve a stable balance and hear everything.  But it may not make the mix very interesting.  So here you do whatever you need to make the mix dynamic, exciting, original – this is where you attempt to create a piece of great art!  I’ll try to do a blog post dedicated to this point in future weeks.

I’ve done a video for my students and NZ teachers who are teaching the level 2 27703  unit standard, showing how to do a basic mix in a live setting.  Here I’m using a Presonus Studio Live mixing desk and have the audio tracks streaming from my laptop to the mixing desk (rather than having a live band in the room).  I find this mixing desk a great tool for teaching live mixing to my students but all the concepts I discuss in the video are equally applicable to mixing in a studio/DAW environment.

This video has worked well for my students who may not have followed my in-class demos and may be too nervous to ask questions in front of others as they’re able to replay parts they don’t quite understand.  It serves a good way of filling in the gaps for them.

Please note, the tracks from this video were downloaded from the excellent Sound on Sound magazine website.

In another blog post I’ll go into detail about my assessment processes for mixing with my senior students.  Students can’t just do a mix – they have to be able to articulate all their mix decisions and why they made them.

Thanks,

Duncan

How to mix… for high school teachers (a starting point)

There are many guides to mixing all over the internet, YouTube, Amazon, etc – it can all be a little overwhelming if you’re a high school teacher wanting to do music technology/recording/mixing with your students.  Where do you start?

Studio One screen shot

Well, if you have the time, in my opinion the best resource is the book Mixing Secrets for the Small Studio by Mike Senior.  Of course there are many video tutorials on recording and mixing from Groove3.com and Askvideo.com as well as free guides on YouTube.  But I’m going to assume you don’t have the time to dig deeply into those excellent resources and want to do something with your students fast.

I’m not going to go into an overall picture of how to mix or get too deep, here is something I do with my year 10 and 11 students (14-15 year olds) that gets them going.

  1. If you don’t have a Digital Audio Workstation (DAW) then download Studio One Free from Presonus – it’s Mac and PC compatible (see my previous blog as to why I like this DAW).
  2. Watch this guide I’ve done about how to download and install it:
    http://youtu.be/kn6hTLC_aUs
  3. Download some multi-track audio files from the excellent Shaking Through website (direct link to “Hop Along” is below – one of my favourite episodes):
    http://weathervanemusic.org/shakingthrough/episodes/hopalongNote, you’ll need to create a free membership to download files (highly recommended).  Other excellent files you can download straight away are available from Mike Senior’s excellent website.If you’d like something more ‘orchestral’ in nature you can download these files composed by a student of mine (you can hear our final mix of it here).
  4. Drag and drop the audio files into Studio One or other DAW.  First bring up the most important instrument (probably the lead vocals) to 0dB (or unity gain).  Then balance all other tracks in proportion so that you have a rough balance.  If you’ve chosen the Hop Along track then you’ll probably do it in the order of: drums, bass, guitars, keys, BV’s, any other stuff.
    Studio One faders
  5. Pan the tracks.  Leave the most important track (vocals) down the middle along with the kick drum, snare drum and bass guitar.  Pan everything else to varying degrees left and right.
    Studio One panning
  6. You’ll now have a rough balance but things won’t quite be sitting nicely.  Now put a ‘channel strip’ (or EQ if using another DAW) plugin on each track.  You now need to cut and boost various frequency bands to take away the parts of the instrument sounds that are not important (such as mid range on a kick drum).  Try stick to just cutting frequencies, don’t boost (as sometimes making something louder makes you think it’s better when it’s really not).  By cutting ‘unnecessary’ sounds from some instruments you create space for other instruments to ‘breathe’.  A good example is to cut mid-low frequencies from the kick drum to stop it from ‘competing’ with the bass guitar for the low end.
    Studio One Channel strip
  7. As you adjust EQ don’t be afraid to go back and change your fader settings on the mixer or alter your panning.

Here is a quick video demonstrating all of the above:

That’s it.  Have your students do this with a bunch of different tracks from Shakingthough.com or Mike Senior’s excellent website.

Those of you that know a lot about mixing will be (rightly) asking… “but what about compression, reverb, gating, special FX, etc, etc?”.  Yes, those are important, but for teachers and students who are starting out mixing I think it’s best to leave it to what I’ve described above and for them to do at least 4-6 weeks on a few different sessions so they fully understand balancing faders, panning and EQ.

I’ve deliberately avoided any theory around EQ, parametric EQ’s, filters, bandwidth and other EQ technical things.  That can come later (and it’s all very important).  For now, just use your ears, and have the class compare their mixes.  Some students will be much better than others… use the strengths of those students to teach the others.

If you would like more detail around the theory of EQ’ing (which is necessary for NZ students doing Unit Standards 27703 and 28007) you can order the relevant workbooks from Learning Ideas Ltd.

Thanks,

Duncan

Effective teaching of composition

I was reading this really interesting blog the other day by Suzie Boss which looks at the research of the New Zealand education researcher and professor John Hattie and how his findings could influence Project Based Learning (this blog is well worth a read, follow the link).

There is a really interesting section of the blog:

But when it comes to evaluating the effectiveness of project-based learning (PBL), Hattie has me scratching my head. Part of the challenge is that he doesn’t focus specifically on PBL, and certainly not on PBL that is designed with an emphasis on high-quality teaching and learning. Problem-based learning winds up near the bottom of teaching effects (0.15). Inquiry-based teaching ranks a little higher (0.31), but still below the hinge point. Meanwhile, Piagetian programs, emphasizing challenges that cause learners to apply higher-order thinking and learn collaboratively (sounding similar, at least in spirit, to PBL) rank near the top (1.28).

What’s more, many of the essential components of PBL turn out to be highly effective. Formative assessment, critical for project success, comes in at 0.90. Feedback, another key to PBL, has an effect size of 0.73. Challenge and practice at the right level: 0.60. Valuing error and creating trust: 0.72. It’s hard to imagine a PBL classroom where those factors are not present.

When Hattie himself synthesizes what matters most for learning, he describes an effective classroom in language that is completely consistent with a PBL environment:

Visible teaching and learning occurs when there is deliberate practice aimed at attaining mastery of the goal, when there is feedback given and sought, and when there are active, passionate, and engaging people (teacher, students, peers) participating in the act of learning.

I imagine I’m probably like a lot of teachers (especially music teachers) in that every minute of every day is filled up with teaching, meetings, running co-curricular groups, developing resources, marking… (hands up if you’re one of those teachers to barely knows what the staff room looks like at lunchtime?).  The last thing I get time for is to look at educational theory, pedagogical techniques, etc.  Any PD I do is usually specifically musically related, rather than on a broader educational level.

So this is why I like summer holidays so much, it gives me time to look at blogs, read some Hattie, and reflect on my teaching practice.  Reading the above part of Suzie’s blog made me realise why I’m turning out to be such an effective teacher of musical composition.

I’m not trained in composition, I don’t like to compose myself, it isn’t something I was ever interested in doing as part of my study and I certainly don’t feel the need to inflict my deep angst on the world in a musical format.  But over the last five or so years my students have been showing a huge level of ‘value added’ with their results.  My good students who are passionate about composition produce great art, but I’m most pleased with those who maybe don’t have great background knowledge but end up showing a huge improvement.

Without intending to, I’ve employed many of the above methods quoted above, specifically:

  • A huge amount of formative assessment – when students have a composition due to hand in at the end of the term they must hand in their drafts at least three times over the preceding four weeks.
  • Feedback – every time students hand in a draft I give them written feedback via email and through annotating their scores (if applicable). I will try to follow this up with one-on-one verbal feedback but I find this is not very effective – too often students don’t take in what I say to them and repeat the same mistakes.  Written feedback provides them with the information that helps them make the most improvement in successive drafts and submissions.
  • Challenge and practice at the right level – even though I haven’t specifically intended to run a project based learning course (until 2015) I’ve kind of already been doing this with composition.  I provide the students many options for the basis of their composition (such as compose for film, compose for a special occasion, compose in response to an artwork, etc – and for each of these I provide multiple films, special occasions, artworks, etc).  What I find is that with these parameters students are able to jump into composing at the level they’re happy with.  I have some very advanced students who compose for full orchestra (one student this year composed a full two hour long musical – and it was really good!), some students are more comfortable composing for singer/songwriters while others compose electronic works with Apple Logic.  Everyone is working within their areas of interest and these then develop into strengths.
  • Valuing error and creating trust – this is very important to the creative process of composition.  And it features hugely in my feedback.  I try to find a balance between encouragement and correcting basic errors (mostly encouraging as composition is a very sensitive and emotionally ‘risky’ thing for students to do) but I always try to emphasise that they must ‘put themselves out there’ and take risks.  That is the only way great art will result.  This sums it up (thanks @ginippi for the image):
    10877618_10204176690032199_1572360879_n

The only other important thing that I do that isn’t mentioned (but there is probably a special Hattie term for it anyway) is modelling the creative process.  While I don’t compose great art, I do understand the compositional process and can model many ways of composing.  Showing students how to start is hugely important.  Giving them a toolbox based on practical demonstration works well.  Textbooks and handouts? – next to useless.

I’ve often felt that maybe I’m not doing a very good job with composition as I’m not presenting a formalised method each year that has me explaining concepts from the from of the class – i.e. chalk and talk.  But when I look at my NCEA results of my students and listen to their recordings I realise that isn’t the case.

As this is supposed to be a technology blog I’d better quickly mention how my students go about submitting their drafts for formative assessment.

  1. Students email me their Sibelius files (if their composition is a traditionally notation based composition) and provide a print out so I can annotate it (I used to do all printing or just write comments referencing bar numbers but I didn’t find this effective – plus printing takes up too much of my time).  If they are working on Logic or Studio One they can email me Dropbox links of their DAW session and bounced MP3’s.
  2. With the second to last draft submission I will ask students to do their own analysis of their composition.  They use Screenflow to ‘talk through’ their composition explaining why they have done what they’ve done.  As much as possible I encourage them to analyse within the context of the musical elements (timbre, form, texture, melody, harmony, etc).  By doing their own analysis of their composition its amazing how many things they’re able to fix up before I give them feedback.  This self-reflection is critical.
  3. I email back students comments and will annotate their scores if applicable.  This has to happen with 48 hours for effective learning to happen and to see a change in the draft that is due the following week.  Therefore I have to schedule into my timetable a period of marking each week and make sure nothing gets in the way of it.
  4. For the final submission I make sure I scan the annotated scores and keep a copy for internal and external moderation of my marking.  It’s really important students get their work back to help them improve for future years of study.

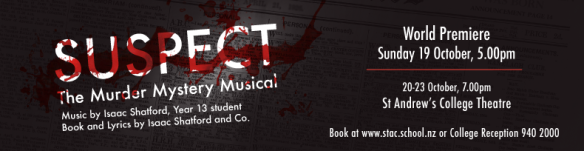
If you want to hear some of my students work, the musical I mentioned above (“Suspect”) is now available on iTunes.

suspect banner

The Seven Sharp programme from TV1 did a really interesting article that you can view by clicking here.

I know people may have suggestions for improvement around student submissions other than email & Dropbox (Moodle, Google Hangout, One Note, etc?) so please comment below if you think it can be done better.

Thanks,

Duncan 🙂