MENZA Keynote Presentation

I feel very honoured to be one of the keynote presenters at the Music Education New Zealand conference in October.

How do I create personalised programmes?

How do students have intrinsic motivation so that they work hard for the love of music, not for assessment credits?

What are the best technology and tools for my musical environment?

How do we make sure all genres are equally valued?

How do I make sure I have an equal representation of genders in my music groups?

These are just some of the questions I have been asking myself over the last few years. And this is the topic of my presentation… “Asking better questions“.

Through questioning my biases, my school traditions and values, my pedagogy and many other things, I’ve seen my department grow and students find their creative ‘place’.

In my talk I’ll go over how I’ve developed my philosophy of learning, and the impact this is having on my students.

My philosophy summed up

If you are coming to the MENZA conference, then why not stick around an extra day and come to my full day workshop on Composition and Technology? You will have the chance to see in depth the tasks and software I use for my ‘commercial’ music students from years 9-13, you’ll learn about how I teach mixing (distilling years of reading and research down to seven simple steps) and you can see how I’ve setup my department.

You can find out more information and register here.

The importance of being creative

Music teachers are busy.  I don’t need to go into all the reasons why… just take my word for it! So it is a shame that music teachers, who should be engaging with their creative sides as much as possible, are often so caught up with admin and managing a large number of classes and a whole co-curricular programme.

I have felt the pressure of the job, and have neglected my own creativity.  While I regularly perform on my instruments with my students, I have found it very hard to spend anytime composing.

So, this year I’ve decided to do something about it and engaged in a Film Composition course through Berklee University.

This has been a 12-week course in which you analyse different genres of film music composition such as love themes, high intensity action, supernatural/grandeur, sad themes, etc

In addition to analysis, completion of short pre-tasks and quizzes on music theory you have to compose music for a 2-3 minute film clip each week.

In a busy work life at school this has been tough.  But, it’s been awesome. I’ve found the following benefits:

  • My students hugely respect that I take my own learning and growth seriously
  • My students appreciate that I’m not asking them to do anything in a week that I’m not prepared to do myself
  • I have been forced to put admin aside to focus on creativity
  • I have gained confidence to share my own work
  • I am better able to demonstrate to my students the creative process involved with composition
  • I now have a bunch of great templates in Logic Pro which I can share with my students as they do their own film composition tasks
  • I have massively improved my MIDI sequencing chops in Logic Pro
  • I have finally got my head around some of the amazing possibilities of what you can do with my sample libraries

Tools/software used

Composing a new piece of music that sounds great for 12 weeks in a row is tough.  However, I’ve been fortunate to have the following tools and software at my disposal:

Native Instruments Komplete Kontrol

img-welcome-hero-kks-mk2_overview_welcome_01-0fd04f5ea840d7cad35b18d8ae7a5a1f-d

Native Instruments Komplete 11

91CKsAxHAGL._SL1500_

Project Sam Symphobia 1 & 2 and Lumina Sample libraries

maxresdefault

Spitfire Audio Orchestra collection

SpitfireMasse_KontaktPLayer

Roli controller and it’s Equator Synth

roli-seaboard-rise-midi-controller-designboom-05-818x557

Demo Reel

Well, I suppose you want to hear a bit of what I’ve done.  Here is my demo reel from the course.  I’ve included short excerpts from five of my 12 compositions in the following genres:

  1. Love theme – Sense & Sensibility ‘kiss’ scene
  2. Action – trailer for Troy
  3. Fantasy – from Once Upon A Time
  4. Suspense – Iron Man (when Tony Stark is captured)
  5. Action/suspense – 2012 deleted scene

The clips don’t make sense all the time with the dialogue and SFX removed (as well as being unable to see the pictures I was composing to) but it gives a good impression of what I’ve been up to.

A successful high school composition programme

Teaching composition to New Zealand high school students has changed hugely over the last 10-15 years.  Around 2005 many schools across the country embraced the Sibelius (or Encore) notation application as a way of notating student compositions.

However, this quite quickly became what students considered to be composition.  They couldn’t really ‘do’ composition apart from Sibelius.  And it meant that those from orchestral/classical backgrounds had a huge advantage over non-music readers when it came to composition.  If everything had to be notated all the time, then the success of a student’s composition was directly related to how well they could understand and use notation.

Now, don’t get me wrong.  I’m a firm believer that all musicians should have at least a working knowledge of notation and score conventions.  It is how we communicate in many contexts.  But, if a student is not using notation regularly as part of their performance practice (for instance, if they’re a singer/songwriter or they play metal electric guitar) then no matter how much we try to force music theory down their throat, they are not going to embrace it and find a use for it.

As an electric bass player who developed a love for jazz I was able to see the point of theory and harmony and embraced it because it made me a better improviser and meant I could play in Big Bands.  But if other musicians can’t find the ‘why’ for notation, then we shouldn’t force it on them.

But anyway, I digress from what this blog is supposed to be about…

In the ‘old’ days (I’m talking from around 2005-2012) we were able to use applications like Guitar Pro to assist guitarists to ‘compose’ (notate) their pieces but this was largely pointless.  A guitarist of a rock or metal genre song (for example) doesn’t really expect other guitarists to learn the piece from notation/TAB.  Most of the time they learn it by ear.  Students were just doing it because a teacher told them to (who were often doing it because they thought NCEA told them to).

However, with the advent of free software like GarageBand, and the huge reduction in price of Logic Pro, world class recording software is within reach of the average BYOD high school student.  This now means that students can compose on instruments (I know… amazing! lol).  Students can record their ideas into Music Memos, GarageBand, Logic or other software and then develop their ideas into cohesive and convincing pieces of music – without the requirement to notate their pieces.

The synths, samplers and effects plugins in the software can be used to spark creativity.  DAW’s haven’t become a substitute for Sibelius – they have enabled students to go deeper in their musical composition and production.

IMG_1448
Workshopping ideas with guitar and recording into Garageband on their laptop

So how do we teach composition with a DAW?

I’ll discuss how I teach composition to NCEA classes (students with at least 2-3 years experience on an instrument).

  • No unit plans or formal class teaching – students just start.  All students with at least 2-3 years experience are able to find a basic musical idea.  They can use their DAW to record this idea (along with a click or a looped sample), develop their own beat to go with it (depending on the genre) and add harmony.
  • As long as they are getting constant feedback from a teacher all students manage to come up with an idea and then start to develop that idea through repetition, sequence, altering the texture/timbre, harmonic accompaniment, etc.
  • Every week all the students have to play where they are up to to the rest of the class.  This fosters a sense of competition (for those students that respond well to this) but it also means they have public deadlines they have to stick to.  They become accountable to each other.  Students are given the responsibility to feedback to each other with positive and negative feedback.  This also forces students to think critically and give quality feedback within the context of talking about the musical elements.
  • Analysis – students don’t know what they don’t know.  And to figure out what makes a good piece of music in a certain genre they need to do plenty of quality analysis.  I get them to listen to pieces of music and comment on the structure, melody, harmony, use of instruments, texture, etc

This process may sound messy but it’s great to own that with the students.  To be a teacher that is constantly adapting and responding to individual and unique student need means I never get bored! It means my students are also constantly teaching me as well.

But it means as a teacher I need to be adaptable.  Sometimes to move some students forward I may need to do a few lessons on harmony, or Bach choral voice leading to assist with their writing for strings, or how to construct a beat in electronic genres, or how to use the arpeggiator functions of synths… but this means I can grow with the students and use these ideas to influence my own composition.

IMG_0923

The result?

The result is that my students find their ‘why’.  They grow, and are proud to share their growth.  My ‘classical’ students still do well and move on to University composition study, but now the music department has grown through the addition of the electronic composers, the singer/songwriters, the rock guitarists.  They all respect each other and learn from each other.

A couple of students that may not have done well in the ‘Sibelius’ era but have ended up producing fantastic compositions (and have been recognised by Play It Strange) can be heard here.

Logan:

https://playitstrange.bandcamp.com/track/normandy-logan-mcallister

George and Bella:

https://playitstrange.bandcamp.com/track/holding-on-bella-ford-and-george-white

Project Based Learning in Music for 2017

There is currently massive change going on in the music industry and in music education.  With new degrees like those offered by Massey University in Wellington, and with new initiatives in cross-curricular arts courses like what Victoria University are offering, school music programmes need to adapt to better prepare their students.  We need to focus less on assessment and more on student learning.

One way I’ve found to put the focus back on learning, and developing music courses that are good for the students (but may only be partly assessed by NCEA) is to incorporate Project Based Learning (PBL).

In New Zealand so many of our programmes of teaching (in any subject) are centred around Achievement Standards.  We look at the assessment, and design courses around teaching to the assessment.  Of course, all good practitioners know this is not the way to do it!  But it’s easier said than done when we have pressure from school management with NCEA targets and magazines like North and South and Metro comparing schools’ achievement data.

There is plenty about PBL on the internet, and websites like Edutopia are full of great articles and advice about incorporating PBL.  But there is surprisingly little out there about how to do it within the context of a high school music course.

PBL has transformed my music programme.  It gives students a focus, it motivates them, it develops personal as well as collaborative skills and at the end they don’t just have credits against their name on a piece of paper, they have something tangible they can show to others and be proud of.

Here are some tips I’ve found for a successful PBL programme:

  1. Make sure students take the time to think through what they love most about music, and what interests them most about the music industry. Any projects that they can come up with (as opposed to be suggested to them by the teacher) will have greater ‘buy in’.    Students have ownership of what they are doing.
  2. Provide marker points through the year where students have to submit drafts and demonstrate progress. At regular intervals students need to write up their progress on a public blog (WordPress.com is a great website for public blogs).  Making it public makes them accountable.  If they know other people are following their progress, it will provide extra incentive for them to get the work done.  It also allows time for them to do reflection on their progress, which is crucial.
  3. Creating music for a purpose, for an audience adds greater motivation than doing this for and a single assessment. Lock in dates for the events they’re organising, or delivery of their project at the start of the year and get them to use a calendar. It may also be valuable getting a wall calendar up in your class with the events and assessment dates written in.  Start each week with a catch up and reminder about how far away important dates are.

Here are some of the projects that my students are working on at the moment:

Chamber Music Night – The ‘classical’ students are composing music for chamber trios to be performed on a Chamber Music Night.  This night is our annual lead up concert to the National Chamber Music Competition so it provides a great opportunity for students to perform their new compositions.  Students are responsible for making promotional posters/websites/social media presence.  They are to organise catering and ticketing.  They are to organise presenters and develop a programme.  They are also going to setup a recording system and record the night for mixing at a later stage.  And because we can’t ignore the NCEA aspect to it they will be getting these credits (I’ll show examples of level 2 Standards):

  • Composition – 6 credits
  • Performance (group) – 4 credits
  • 27703 (mixing) – 4 credits
  • 27658 (sequencing & notation), for mock ups of their composition – 4 credits
  • Total: 18 credits – if they also do Solo Performance at another stage plus an external Standard or two (like Score Reading & Aural) they will have a very full course.


Singer/Songwriter Night – Each year as part of our Winter Music Festival we run a night for songwriters.  It is a similar deal to the Chamber Music night in but it will be a different group of students organising it – most likely those that see themselves as songwriters instead of classical musicians.  You can see what they did in last year’s concert here: http://tinyurl.com/STACstudioset

Rock Night – Same deal as above but on a different night leading up to the Smokefree Rockquest.

EDM Night – For those students that want to compose in electronic genres, or perform with devices like Ableton Push, this year we are offering a project based around organsing an EDM night.  What is interesting about this though is that they are going to collaborate with dancers in the school who will choreograph to the music.  This will be a back and forth relationship as students adapt their music to better fit the dance, and vice versa.  The final performance will take place outside, with a PA system and light show/projection system.

Once again, multiple Achievement Standards will be able to be assessed, but not just from music, but other Performing Arts domains.

When students get to year 13 they often want to focus on their own projects, such as making an album.  Here is an album that one of my recent graduates produced while at school for his major project https://www.facebook.com/TheHazeBandNZ/

Offering courses in PBL has reinvigorated our department.  Students are very excited about the opportunities, are highly motivated, and are then very proud to share what they’ve produced with our school community and their families.  It also provides regular exposure for our music department, which works great when it comes time to request an increase in budgets to buy more recording equipment and instruments! J

ADE Institute 2016

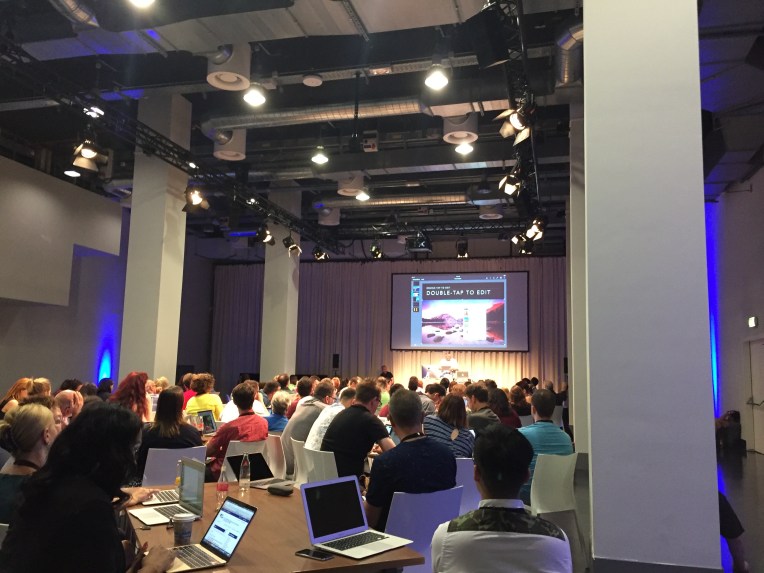
In July I was very fortunate to attend and present at the Apple Distinguished Educators Institute in Berlin.  This was a gathering of just under 400 teachers from around the world who actively push the boundaries to develop innovative teaching techniques.

This is my second Institute and like the first, it was one of the most inspirational weeks of my teaching career.  I’m very grateful for St Andrew’s College who paid for my airfares to attend this week of professional development.

The ADE Institute runs from a Sunday evening through to Thursday night.  This year it was just for ADE alumni, no new people were accepted to the programme.  In 2017 there will be regional Institutes for Europe/Africa, Asia/Pacific and the Americas which new people can apply to be part of (keep an eye on ade.apple.com early in 2017 for applications).

The structure of the Institute can be summed up in this (rather blurry) image:
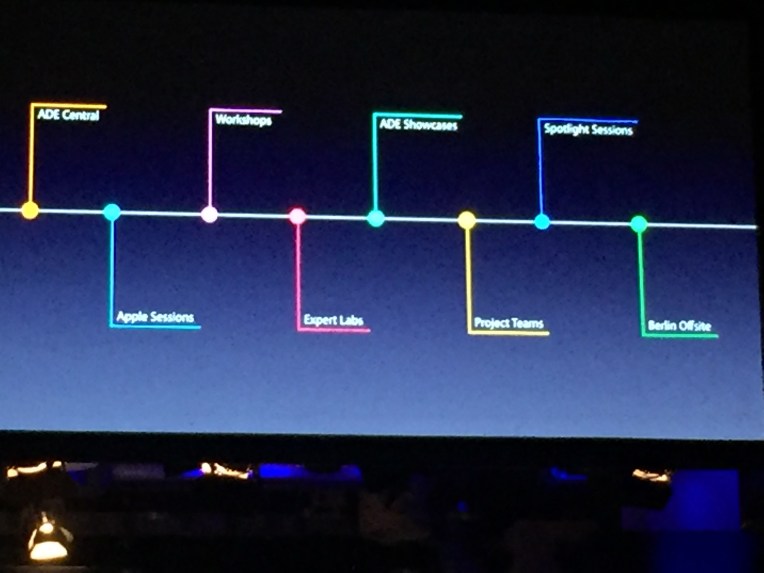
ADE 2016 summary

ADE Central

One of the best parts at the conference centre/hotel was the ADE Central.  This was a large lounge where you had time to work on your projects, collaborate, play with STEM toys like Bloxels, Spheros and VR.  Most importantly, it was a great place to meet other teachers over a drink and discover common interests.

Apple Sessions

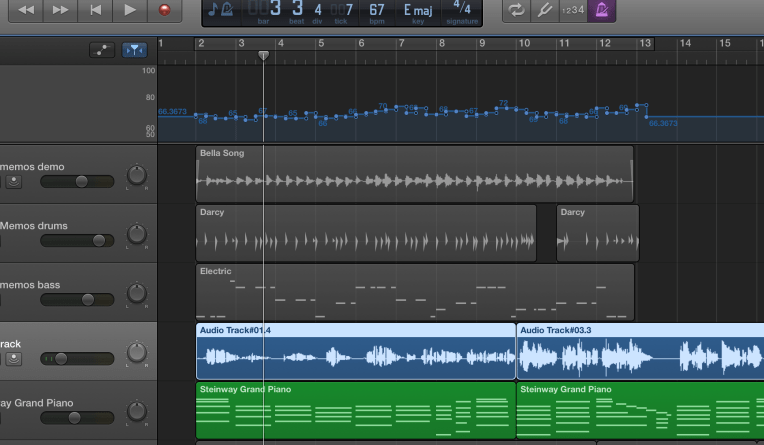
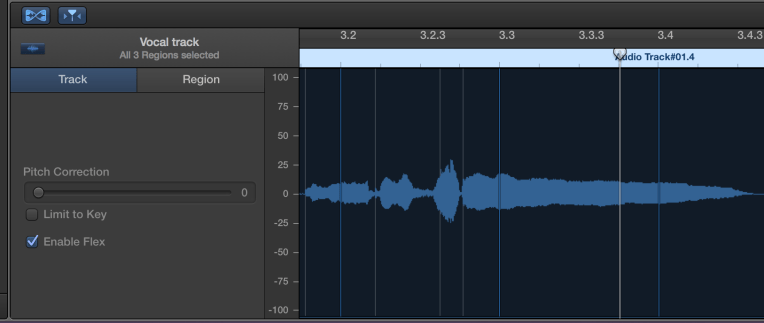
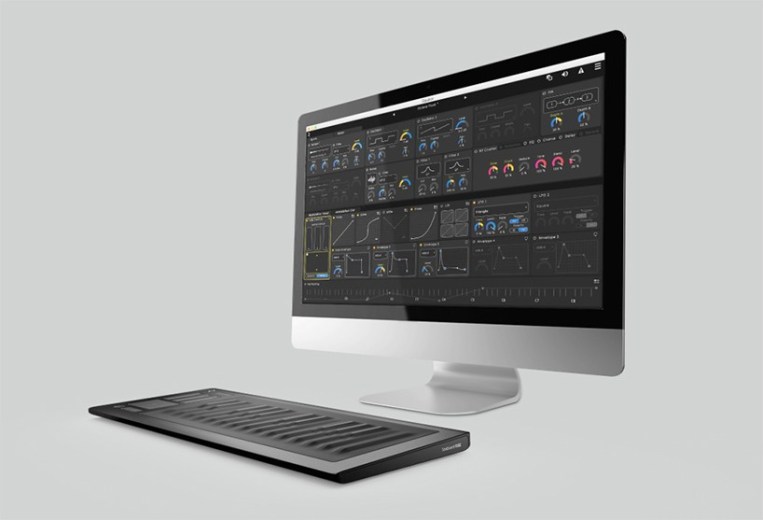
This year there were some fascinating presentations from Apple staff.  Once again, John Danty (Head of Logic & Garageband) was another highlight with his demonstration of the new features in Garageband on the iPad.

It was also great to see Final Cut Pro get more exposure as many educators I know regularly use it and think it’s a fantastic video editing application for high school teachers.

And of course, these sessions are where a lot of the scene is set for our projects, where info about Apple updates and educational initiatives are shared and where all our conference admin takes place.

Workshops

This year ADE was structured so that we had much less time having full Apple Sessions in the ballroom.  Instead, there were multiple workshops on a variety of topics.  I attended workshops on Advanced Editing with Final Cut Pro, Advanced Keynote and how to deliver fantastic presentations.

The last session was particularly valuable.  Not just for the workshops that I run with teachers, but some very good strategies and techniques were shared for presenting to high schoolers as well.

IMG_5361

Expert Labs

Apple were very generous by flying out many of their team leaders for various software development teams.  They are very talented, smart and accessible and the smaller (in some cases one-on-one) sessions they ran were perfect for teachers trying to find answers to problems they’ve had, or for getting more information on what was shown in Workshops and Apple Sessions.

I had a great time catching up with John Danty who hosted me (along with Matt Baier) at Cupertino last year.  It was inspirational to see that John, as busy as he is, has just released an album.  If he has time to be creative, then I certainly can’t use school as an excuse not to invest time into practising my instrument!

ADE Showcases

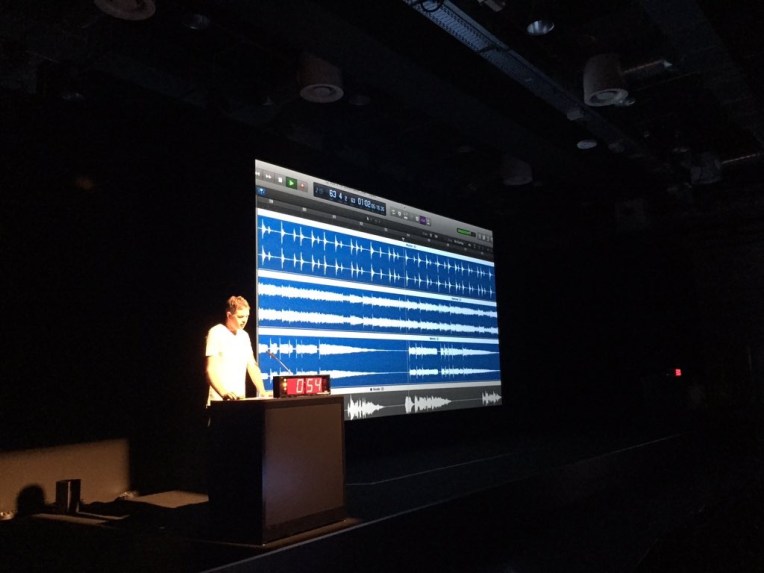
For many, including me, this is the highlight of ADE.  This is where teachers have three minutes to present something to the conference about innovative teaching techniques they’ve been using with their students.  Ten teachers per session are selected.  There is a pretty rigorous application and development process before you’re allowed to get up at an ADE Institute and present, but I was fortunate enough to present about my department and how I’ve changed the culture of St Andrew’s College music to enable growth.

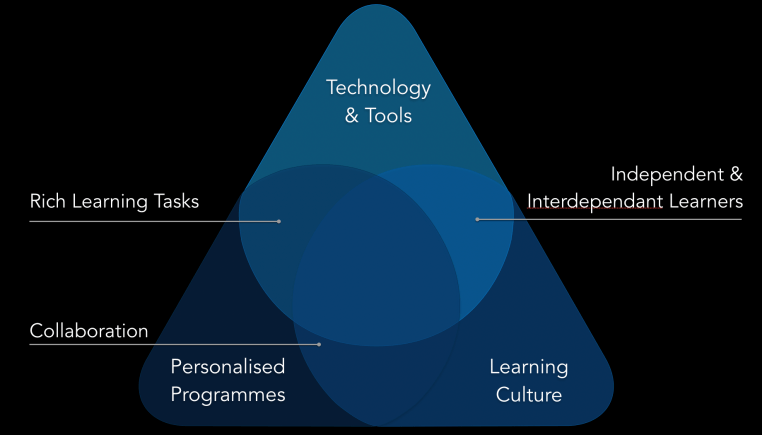
Preparing for this presentation made me do a lot of inquiry around whats made my department successful, and it has been really great for giving me a framework for further innovation in the department for 2017.

IMG_6490

Project Teams

This is where the long term benefits of ADE come from.  It’s where you get into a small team of educators from around at the world and you work on a major project together.

This year I’m working on developing a website with tools for junior high school teachers who are wanting to deliver cross-curricular programmes.

Spotlight Sessions

Another new initiative at ADE 2016.  This is where teachers have a chance to run workshops on various pieces of software, teaching techniques or anything which they think will benefit the community.

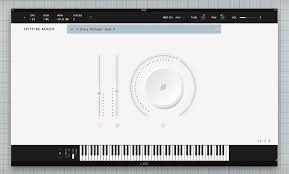
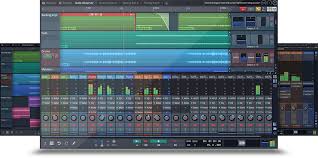
I ran a workshop on showing how the three Apple music apps, Music Memos, GarageBand and Logic Pro work together as part of the musical composition process.  I blogged on this before and you can read a summary here.

Berlin Off-Site

One of the coolest things we did was essentially have the day in the middle of Berlin to explore.  Apple dropped us off at the Brandenburg Gate with a Museum Pass, sightseeing bus passes, metro cards, lunch vouchers, maps and guide books, and essentially told us to explore for a few hours.  We just had to make sure we took lots of photos to share to our collaborative Photo Streams.

We then met back up at the Apple Store for an amazing presentation by the makers of the Eye-Em app and a well known Berlin Photographer.

So what?

From the photos, you can see I had a really nice time.  I got a good tan and it was great to get away from a NZ winter for a couple of weeks.  But what difference has this made to my teaching?

Well, the real benefit is not in any resources I develop as part of the project team, or the information I learned about how to use Final Cut Pro more efficiently for editing school music videos, or even the chance to present to 400 of the worlds top educators.

The real benefit for me is in the relationships I’ve developed and friends I’ve made with people who are at the top of their game in their schools and communities from all over the world.  Every single person I met is an innovator.  They all love to see kids grow and meet their potential.  Every person I met doesn’t only see teaching as a worthwhile vocation, they live education.  Like me, they spend their weekends, evenings and holiday time thinking about their classes, developing resources, looking for opportunities to up-skill, looking for ways to better serve their students.  Teaching is their vocation, but it’s also their calling and their hobby.

And to be surrounded by people like that is heaven.  It’s inspiring.  It means I come back to St Andrew’s College and my networks of NZ Music Teachers with new ideas but also with a renewed passion to see music education in New Zealand produce the finest young musicians, composers and educators in the world.

Creating Music with Apple Apps

As I write this I’m winging my way to Europe to attend the Apple Distinguished Educators Institute.  One of the workshops I’ll present while I’m there is demonstrating how my students have been using three key Apple Apps as part of their creative workshop.

What I love about what Apple have done is that these apps are all fantastic by themselves.  But when you look at how they work together to support the compositional and production process they create their own ‘ecosystem’ that greatly assist students with creating original music.

Music Memos

Music Memos is the newest app.  It’s basically the Voice Recorder app that as been available for iOS for a long time but configured for musicians with a few neat features.

My students use it on their iPhones and iPads for capturing their rough musical ideas when they’re in practise rooms, on the bus or anywhere that inspiration strikes.

Here is a student of mine using it to record some ideas she had for a verse in a new song.

Music Memos has this amazing ability to not just record audio, but to also analyse the timing of the performance and the harmony used.  It is then able to create a session timeline of bars and beats and provide you with information of the chords that were played.

Screen Shot 2016-07-15 at 5.48.31 AM

It can even provide a virtual band of bass and drums to play along with your performance (of which settings you’re able to configure).

Screen Shot 2016-07-15 at 5.48.38 AM

While all this sounds amazing in reality my students haven’t found it hugely accurate with it’s analysis (but this is more the fault of the performers than the app).  With very good performers (like you’ll probably see on YouTube reviews of the App) it works fine but with high schoolers I’ve found the chordal analysis and bass & drums backing very hit and miss.

You will notice in the video that Bella was very intentional about trying to play as in time as possible and strongly outlining the beat – this really helps Music Memo’s with the analysis (but even then, it still got a lot of chords wrong in the analysis).  However, many students struggle to play their parts clearly so the analysis can be rather misleading.

But, this doesn’t diminish how useful Music Memos is in capturing ideas, tagging them with keywords and allowing them to share those ideas with friends.  It really is the perfect digital scrapbook.

However, when the chordal analysis does work it’s amazing as you’re able to import your Music Memos files into GarageBand on iOS or MacOS (including a MIDI realisation of the bass and drums that were added).

GarageBand

Music Memo’s projects are easily able to be opened in GarageBand on the iPad.  This is fantastic as you’re then able to use the amazing ‘Smart Instruments’ to create new chord progressions, accompaniments from a variety of instruments such as keys, bass, drums, strings, etc  For students that don’t play piano or guitar this is a massive support to their songwriting.

However, using iCloud you’re also able to open Music Memos projects into GarageBand on the MacOS.

This is what we did here.  Bella opened her project up so that she could record some MIDI keys and start mucking around with overdubbing vocals, harmony parts, etc  She’s also able to alter the exisiting Music Memos Bass and Drums or she can create new parts using GarageBand’s Drummer tracks.

What is very clever is that GarageBand has created a tempo map of her performance in Music Memos so any loops we drag in to the session will be snapped to the correct timing.

Screen Shot 2016-07-15 at 5.58.24 AM

However, if we wanted it to be all exactly in time we can do this be deleting all the tempo changes in the tempo track at the top of the window.  GarageBand is then able to conform the original Music Memos performance into time using Flex time.

Screen Shot 2016-07-15 at 5.59.56 AM

The best thing about using GarageBand at this stage of the songwriting process is that the student is now able to start playing around with the structure, instrument choice, drum patterns, add vocal harmonies, overdub guitar solos, etc – basically create a polished ‘demo’ of the song and arrangement.

This is of great assistance to the composer and musicians that are going to be collaborating in a recording session.

If you’d like to download Bella’s basic demo and have a go at creating your own arrangement you can do so by clicking here (please don’t share or sample this work – all copyright is retained by Isabella Ford and St Andrew’s College).

If the artist is really happy with the demo then they’re able to open their GarageBand file in Logic and record in a studio environment.  However, for this project we decided to start in Logic from scratch with the musicians.

Logic Pro X

Once Bella had her song sorted out we went into our school studio with musicians for a few hours.  She played them her song live and also played her demo from GarageBand.  They discussed what feel it should have, and how to structure the piece.  The string player (who also did BV’s) thought through possible parts she could add in and discussed with Bella.

They ended up adding in an extended solo section which is not what Bella had originally intended.

Here is the final result:

We recorded into Logic Pro X through an Apogee Symphony interface using preamps from Grace, La Chapell, Focusrite, Radial and API.  Our studio also has very nice acoustics.  Using equipment and a facility of this quality meant that we were able to get very good sound tracks that were easy to make a rough mix of in a couple hours.

However, the biggest reason why this song sounds great is not because of the quality of our equipment, or the skill of the musicians (of course these things are essential).  It was the effective creation process that these three Apple Apps helped with.  Through capturing ideas in practise rooms with Music Memos, to crafting an effective arrangement  and ‘demo’ in GarageBand, and finishing with recording a live band of skilled musicians into Logic Pro X.

This workflow is what has been key to the success of this song.  And to prove this isn’t an isolated case here are some of the other songs produced by my students in this manner.


Strategy for growing Music Tech skills in Music students

At my school, St Andrew’s College, we’ve got one of the best Music Technology programmes in New Zealand.  We have a world class studio.  Students are making albums in which they compose, perform and record all their own material.  But the thing is… I’ve just had the insight that I’ve never really had a strategy for growing music technology skills in my students from years 9-13… it’s all just kind of happened.

This week I’m running workshops for teachers in how to create a music technology programme and it’s through the course of the first day that it’s dawned on me.  I’ve got a pretty good course running, but it could be so much better if I am more intentional about what I want to see produce by students at each year level.

Currently this is what I’m running at each year level:

Year 9

All students in our school do ‘core’ music for two periods a week.  In the past they’ve made loop based compositions with Mixcraft and Soundation but this year I’ve moved on to using the excellent Soundtrap.com.

With loop based composition it has just been about exposing students to the basics of how a Digital Audio Workstation (DAW) works and to focus on their compositional skills of developing structure and texture.

Recently (as in… last week) I got these students (who are not ‘music’ students, most of them don’t play instruments) to plug in MIDI keyboards to their computers and to run Soundtrap.com while doing classroom performance.  Here is the result of what they came up with:

The next step is to get them composing using loops and making melodies with keyboards utilising the pentatonic scale.  Or, I could get them to make drum beats using loops or the built in sampler on Soundtrap, compose their melodies on glockenspiels or Xylophones (or other instruments if they play them) and to then record in their compositions to Soundtrap using their laptop microphone.

I’m rather excited now, I can’t wait to get into next term and try it!

Year 10

In year 10 students can choose to take ‘Option’ Music.  In this course students are involved with writing songs and recording them using MIDI keyboards and microphones with Garageband.  This course last year was the most successful course I’ve run and as a result this year we now have our largest year 11 class St Andrew’s College has ever had.

I wrote a blog about this in depth last year.  But here is a clip of students creating in the studio.

Year 11

In the year 11 course I have given students the option to do composition in a DAW, not just by using Sibelius as I have traditionally done.  This is hugely exciting as I’m seeing an amazing level of creativity.  The NZ Music Commission has been hugely helpful with their composers in residence scheme and the tutor they’ve provided us has been excellent.

Here is an example of what a student has composed.  This is from a student who plays Oboe to around grade 5 level so it was a huge surprise to me to find out she had this in her!

At year 11 students also learn the basics of putting together PA and recording systems, what microphones are good for which situations and how to run sound for a lunchtime concert.  The focus has traditionally been on just what the equipment does and how to connect it.

Students complete Unit Standards 27656 and 26687.  Generally they’re using Studio One Prime, Pro Tools First or Garageband.

Year 12

In year 12 students complete Unit Standards 27658 and 27703 so they get a good grip on how to mix and how to use Parametic EQ, Compression, Delays & Reverb.  They take tracks recorded by other people from websites like shakingthrough.com and mix them.

Because of the requirements of the Unit Standards they can’t use beginner software like Garageband or Soundtrap so they move up to Pro Tools (or Pro Tools First), Logic or Reaper.

Year 13

This is when it all comes together and students engage in Project Based Learning, often to make an album of material they have composed and performed.  An excellent example is from one of my students last year who made a whole album.

In terms of assessment students complete Unit Standards 23730 and 28007.

Reflection

When I look at what my students are producing I’ve got a huge sense of pride.  But, I get the sense that if I provided them with more clarity around expectations of what they’ll be producing each year, they’ll be producing albums in year 13 that will truely be mind blowing.

So, what would an overall high school music course music technology plan look like?  I’ll let you know when I write the next blog 🙂


Teacher training – Music Technology

For New Zealand High School teachers here are the details of some Professional Development workshops I’m running.  Please register your interest by emailing sales@learningideas.co.nz

Tuesday 12 April – Incorporating Music Technology into your Music Department
Cost: free (this day is funded by the Heads of Independent Secondary Schools Trust so is only available to teachers from Independent Schools)
Time: 10-4pm
Venue: St Andrew’s College, Christchurch
Topics covered:
  • Course structure for Achievement and Unit Standards
  • Project Based Learning
  • Equipment and skills required to teaching Performing Arts Technology and Music Technology Unit Standards
  • Collaborative Composition using technology
  • Open forum time for teachers to discuss challenges and successes of teaching in an Independent School environment
  • Apple Distinguished Educator Programme
Wednesday 13 April – A beginners guide day for teachers new to teaching Music Technology.
Cost: $150.00 + GST
Time: 10-3pm
Venue: St Andrew’s College, Christchurch
Topics covered:
  • Overview of gear required for teaching music technology – basic studio setup
  • Overview of 27656 (MUSTEC 1)
  • Assessment tips and techniques for 26687 (SOND 1)
  • Producing Notation from Audio & MIDI including a demo of the new features of Melodyne 4 (if time)
Please bring your laptop and a MIDI keyboard (although I have plenty if you to use if it’s inconvenient for you to bring your own).
To prepare for this day please download and install the free software Pro Tools First from: http://apps.avid.com/ProToolsFirst/
Please note, this may take some time so please aim to install it a few days in advance of the workshop, not the night before ;-).  Please also watch the getting started videos further down on that page (this will take no more than an hour).  You also need to download the free Xpand 2 plugin/software instrument through the Avid Marketplace (from within Pro Tools First) but we are able to do this at the workshop.
Thursday 14 April – An advanced day focusing on best practice for teaching and assessment of level 3 Performing Arts Technology Unit Standards.
Cost: $195.00 + GST
Time: 10-3pm (with time for questions and discussion until 5pm).
Venue: St Andrew’s College, Christchurch
Topics covered:
  • Assessment tips and techniques for 27703 (SOND 2)
  • Assessment tips and techniques for 28007 (SOND 3) – as part of this we will record and mix a live student band and walking through the assessment process.
  • Assessment tips and techniques for 27658 (MUSTEC 3)
  • Assessment tips and techniques for 23730 (new v4 for 2016)
  • Course Design for year 13 – Project Based Learning (if time)

The ideal setup for a school recording studio

Last year I was lucky enough to be granted the Head of Independent Schools Scholarship Trust award. This enabled me to travel to San Francisco and NYC to study how Music Technology is successfully being incorporated into high schools.

As a result of this study I have produced a document called The Music Educators Technology Survival Guide. This is a free download and takes you through recommended equipment required to setup up a music technology programme in your high school. It also provides an overview of the requirements for the NZQA Unit Standards, which you may use to assess your students’ music technology skills.

However, it’s one thing to have all the gear for teaching music technology but I’ve found the physical makeup of your studio/recording/mixing spaces, are critical to student success.

Of course, the quality of the acoustics in your recording space(s) is one of the most important factors but unless you’re involved in a new build of your department there may not be a huge amount you can do (whatever you do, don’t put egg cartons on your walls, they will only make things worse!).

But if you are lucky enough to plan a new setup this is what I recommend you aim for when you’re trying to record a rock band.

Recording Room Setup

Band recording in one room

Some important things to note:

  • All the musicians (apart from the singer) are recording in the same room at the same time but the only instrument that is actually mic’ed up in the recording room is the drum kit.
  • The guitar signal is recorded via a DI box, which is then outputted to an amplifier in a separate ‘amp’ room (using a specialized reamp device). The guitar amp is mic’ed up with one or two mics and those signals are then returned to the recording system. The guitar amp signal is then fed back to the musicians via headphones.
    Guitar Signal Flow
  • The bass player is recorded via a DI box with the signal returned to the musicians headphones. The bass track usually sounds great if you have a good quality DI (like a Radial JDI) but if you need to reamp it later and/or overdub this is also an option.
  • The singer is recorded in the mixing (or other) room with their signal coming back to the musicians’ headphones. If the quality of the singer’s track is not good enough they can be overdubbed later.

Why does this setup work so well?

Generally high schools students are not going to be good enough to record to a click track and retain a good feel, and they’re also not great at overdubbing instruments one by one. So this setup allows them to play all together as they would in a normal rehearsal room, hopefully creating a great groove.

But with our multi-room setup (i.e. having an amp room) we are able to record each instrument on to isolated tracks in our DAW so if one musician makes a minor mistake you don’t have to stop the take as you would if you had the amps in the same rooms as the drum microphones. Any minor mistakes can be cut out and re-recorded (or inserted from another take) just by the musician that made the mistake, without forcing the whole band to do another take.

Having all instruments on isolated tracks (without any ‘bleed’ from the other instruments in their tracks) allows us to fix timing and pitch issues with software like Celemony Melodyne.

On a recent session the bass player had huge trouble locking in with the drums. If the band had recorded to a click track it would be easy to ‘quantize’ the bass audio to the grid but as I said before, most high school bands aren’t good enough to be able to record to click well.

But using the new version of Melodyne 4 you are easily able to generate a ‘tempo map’ of the performance (most likely using the drum kit as your timing reference) which you can then quantize the bass to, making the two musicians perfectly in time with each other (even though they didn’t record to a click). I’ll do a full review of this software and walk through this process in a future blog.

If you want hands on, practical help with understanding how to create a recording setup like this I’m running workshops for teachers – Learning Ideas Teacher Training.

What is your physical recording setup in your school?  Comment below and share what works for you.

Thanks, Duncan