32-bit recording

It is rare that in a particular year there is a huge standout product or piece of music technology equipment. While everything is always getting better and cheaper, often it is gradual improvements to things like recording software or microphones which make the life of a recording musician and composer easier in some way.

However, last year a new audio recorder came out that is particularly worth of mention. The Zoom F6.

Firstly, the basics: the Zoom F6 has six microphone inputs allowing you to record pretty much any kind of small ensemble. It is incredibly small (seriously, it’s much smaller than you would think by looking at pictures of it online). It records to SD card so if you are recording somewhere like the Big Sing, Rockquest or Chamber Music competition you can do recordings without having to also lug around a laptop.

However, what makes this portable audio stand out from the many other portable audio recorders on the market (and there are a lot of them) is the fact that it can record 32-bit floating point audio files. Why is this important? Well, in short, it means that you never have to worry about correctly setting the input or gain levels. It is physically impossible to record too quiet or too loud.

For anyone that has any experience with recording you’ll know that if you set the levels too high on your recording interface then you’ll get clipping or distortion. Working with student bands a common problem is setting your recording levels during their sound check or practice, but when it comes to the actual performance or recording they all of a sudden play twice as loud, distorting your audio signals.

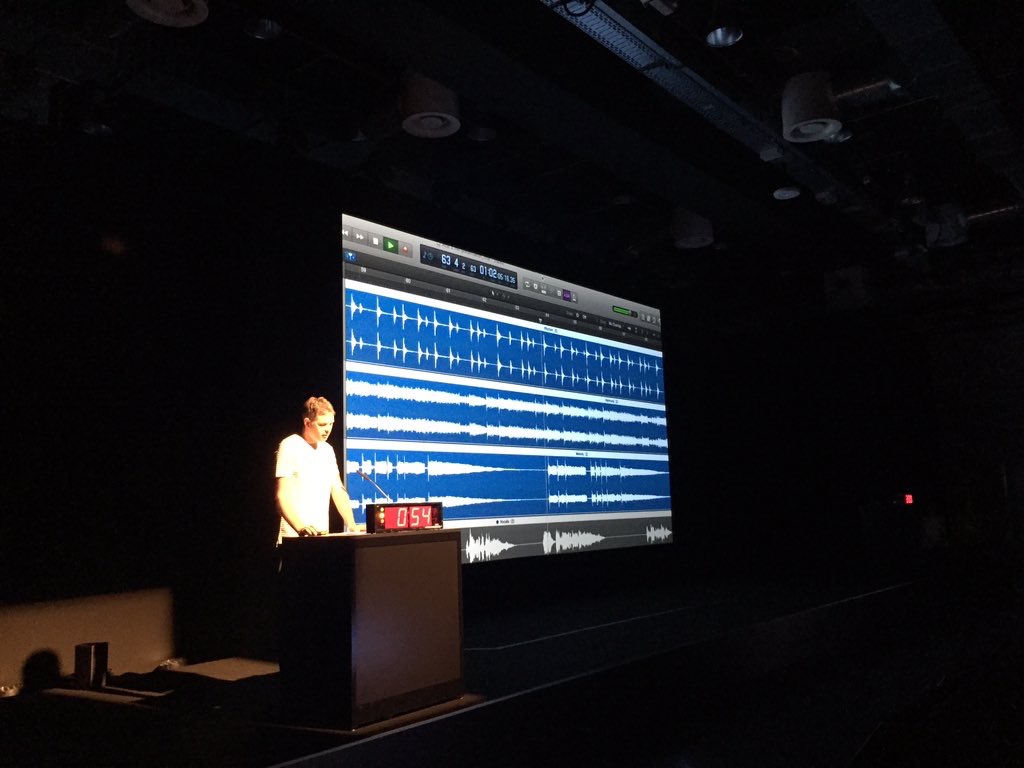
This is no longer a problem with 32-bit audio recording. Here is a great example of someone demonstrating this with the smaller Zoom F3:

In the past we used to always record digital audio at 16-bit quality. This gave us a dynamic range of 96 dB. 24-bit audio quality gives us a dynamic range of 144 dB which is a massive improvement. However, with both of these formats we can never record over 0 dBFS, which is the clipping point. With 32-bit audio though, we have a dynamic range of 1528 dB, including the ability to go a massive 770 dB above 0 dBFS. The greatest difference in sound pressure level on Earth is only around 210 dB! See here for all the math.

I can’t really underestimate what a big deal this if for field recording. In the past while recording students performing outside, or even in situations where I’m recording tutorials in my classroom, there have been times that the input signal controls have accidentally been knocked making my tracks way too loud and distorted and ruining what we were trying to record (and often I only realise that after everyone has packed up and gone home and I’m sitting down to mix!). With 32-bit recorders this is no longer a concern.

To see the Zoom F6 in action here is a recording we made of some students performing at the top of the Port Hills at sunrise:

In this setup I had two microphones setup in a stereo ORTF arrangement, three microphones used as close mics spread out across the performers and the sixth input dedicated for the guitar DI box. The audio levels were all over the place at the time of recording but using the ‘sort of free’ recording software Reaper I was able to balance everything up nicely.

The microphones suffered terribly from wind noise so I had to use the excellent Izotope RX software to clean the tracks up.

So, if you do a lot of recording in different spaces, then I highly recommend you trial one of these units from your local music store.

ADE Institute 2016

In July I was very fortunate to attend and present at the Apple Distinguished Educators Institute in Berlin.  This was a gathering of just under 400 teachers from around the world who actively push the boundaries to develop innovative teaching techniques.

This is my second Institute and like the first, it was one of the most inspirational weeks of my teaching career.  I’m very grateful for St Andrew’s College who paid for my airfares to attend this week of professional development.

The ADE Institute runs from a Sunday evening through to Thursday night.  This year it was just for ADE alumni, no new people were accepted to the programme.  In 2017 there will be regional Institutes for Europe/Africa, Asia/Pacific and the Americas which new people can apply to be part of (keep an eye on ade.apple.com early in 2017 for applications).

The structure of the Institute can be summed up in this (rather blurry) image:

ADE 2016 summary

ADE Central

One of the best parts at the conference centre/hotel was the ADE Central.  This was a large lounge where you had time to work on your projects, collaborate, play with STEM toys like Bloxels, Spheros and VR.  Most importantly, it was a great place to meet other teachers over a drink and discover common interests.

Apple Sessions

This year there were some fascinating presentations from Apple staff.  Once again, John Danty (Head of Logic & Garageband) was another highlight with his demonstration of the new features in Garageband on the iPad.

It was also great to see Final Cut Pro get more exposure as many educators I know regularly use it and think it’s a fantastic video editing application for high school teachers.

And of course, these sessions are where a lot of the scene is set for our projects, where info about Apple updates and educational initiatives are shared and where all our conference admin takes place.

Workshops

This year ADE was structured so that we had much less time having full Apple Sessions in the ballroom.  Instead, there were multiple workshops on a variety of topics.  I attended workshops on Advanced Editing with Final Cut Pro, Advanced Keynote and how to deliver fantastic presentations.

The last session was particularly valuable.  Not just for the workshops that I run with teachers, but some very good strategies and techniques were shared for presenting to high schoolers as well.

IMG_5361

Expert Labs

Apple were very generous by flying out many of their team leaders for various software development teams.  They are very talented, smart and accessible and the smaller (in some cases one-on-one) sessions they ran were perfect for teachers trying to find answers to problems they’ve had, or for getting more information on what was shown in Workshops and Apple Sessions.

I had a great time catching up with John Danty who hosted me (along with Matt Baier) at Cupertino last year.  It was inspirational to see that John, as busy as he is, has just released an album.  If he has time to be creative, then I certainly can’t use school as an excuse not to invest time into practising my instrument!

ADE Showcases

For many, including me, this is the highlight of ADE.  This is where teachers have three minutes to present something to the conference about innovative teaching techniques they’ve been using with their students.  Ten teachers per session are selected.  There is a pretty rigorous application and development process before you’re allowed to get up at an ADE Institute and present, but I was fortunate enough to present about my department and how I’ve changed the culture of St Andrew’s College music to enable growth.

Preparing for this presentation made me do a lot of inquiry around whats made my department successful, and it has been really great for giving me a framework for further innovation in the department for 2017.

IMG_6490

Project Teams

This is where the long term benefits of ADE come from.  It’s where you get into a small team of educators from around at the world and you work on a major project together.

This year I’m working on developing a website with tools for junior high school teachers who are wanting to deliver cross-curricular programmes.

Spotlight Sessions

Another new initiative at ADE 2016.  This is where teachers have a chance to run workshops on various pieces of software, teaching techniques or anything which they think will benefit the community.

I ran a workshop on showing how the three Apple music apps, Music Memos, GarageBand and Logic Pro work together as part of the musical composition process.  I blogged on this before and you can read a summary here.

Berlin Off-Site

One of the coolest things we did was essentially have the day in the middle of Berlin to explore.  Apple dropped us off at the Brandenburg Gate with a Museum Pass, sightseeing bus passes, metro cards, lunch vouchers, maps and guide books, and essentially told us to explore for a few hours.  We just had to make sure we took lots of photos to share to our collaborative Photo Streams.

We then met back up at the Apple Store for an amazing presentation by the makers of the Eye-Em app and a well known Berlin Photographer.

So what?

From the photos, you can see I had a really nice time.  I got a good tan and it was great to get away from a NZ winter for a couple of weeks.  But what difference has this made to my teaching?

Well, the real benefit is not in any resources I develop as part of the project team, or the information I learned about how to use Final Cut Pro more efficiently for editing school music videos, or even the chance to present to 400 of the worlds top educators.

The real benefit for me is in the relationships I’ve developed and friends I’ve made with people who are at the top of their game in their schools and communities from all over the world.  Every single person I met is an innovator.  They all love to see kids grow and meet their potential.  Every person I met doesn’t only see teaching as a worthwhile vocation, they live education.  Like me, they spend their weekends, evenings and holiday time thinking about their classes, developing resources, looking for opportunities to up-skill, looking for ways to better serve their students.  Teaching is their vocation, but it’s also their calling and their hobby.

And to be surrounded by people like that is heaven.  It’s inspiring.  It means I come back to St Andrew’s College and my networks of NZ Music Teachers with new ideas but also with a renewed passion to see music education in New Zealand produce the finest young musicians, composers and educators in the world.

Teacher training – Music Technology

For New Zealand High School teachers here are the details of some Professional Development workshops I’m running.  Please register your interest by emailing sales@learningideas.co.nz

Tuesday 12 April – Incorporating Music Technology into your Music Department
Cost: free (this day is funded by the Heads of Independent Secondary Schools Trust so is only available to teachers from Independent Schools)
Time: 10-4pm
Venue: St Andrew’s College, Christchurch
Topics covered:
  • Course structure for Achievement and Unit Standards
  • Project Based Learning
  • Equipment and skills required to teaching Performing Arts Technology and Music Technology Unit Standards
  • Collaborative Composition using technology
  • Open forum time for teachers to discuss challenges and successes of teaching in an Independent School environment
  • Apple Distinguished Educator Programme
Wednesday 13 April – A beginners guide day for teachers new to teaching Music Technology.
Cost: $150.00 + GST
Time: 10-3pm
Venue: St Andrew’s College, Christchurch
Topics covered:
  • Overview of gear required for teaching music technology – basic studio setup
  • Overview of 27656 (MUSTEC 1)
  • Assessment tips and techniques for 26687 (SOND 1)
  • Producing Notation from Audio & MIDI including a demo of the new features of Melodyne 4 (if time)
Please bring your laptop and a MIDI keyboard (although I have plenty if you to use if it’s inconvenient for you to bring your own).
To prepare for this day please download and install the free software Pro Tools First from: http://apps.avid.com/ProToolsFirst/
Please note, this may take some time so please aim to install it a few days in advance of the workshop, not the night before ;-).  Please also watch the getting started videos further down on that page (this will take no more than an hour).  You also need to download the free Xpand 2 plugin/software instrument through the Avid Marketplace (from within Pro Tools First) but we are able to do this at the workshop.
Thursday 14 April – An advanced day focusing on best practice for teaching and assessment of level 3 Performing Arts Technology Unit Standards.
Cost: $195.00 + GST
Time: 10-3pm (with time for questions and discussion until 5pm).
Venue: St Andrew’s College, Christchurch
Topics covered:
  • Assessment tips and techniques for 27703 (SOND 2)
  • Assessment tips and techniques for 28007 (SOND 3) – as part of this we will record and mix a live student band and walking through the assessment process.
  • Assessment tips and techniques for 27658 (MUSTEC 3)
  • Assessment tips and techniques for 23730 (new v4 for 2016)
  • Course Design for year 13 – Project Based Learning (if time)

The ideal setup for a school recording studio

Last year I was lucky enough to be granted the Head of Independent Schools Scholarship Trust award. This enabled me to travel to San Francisco and NYC to study how Music Technology is successfully being incorporated into high schools.

As a result of this study I have produced a document called The Music Educators Technology Survival Guide. This is a free download and takes you through recommended equipment required to setup up a music technology programme in your high school. It also provides an overview of the requirements for the NZQA Unit Standards, which you may use to assess your students’ music technology skills.

However, it’s one thing to have all the gear for teaching music technology but I’ve found the physical makeup of your studio/recording/mixing spaces, are critical to student success.

Of course, the quality of the acoustics in your recording space(s) is one of the most important factors but unless you’re involved in a new build of your department there may not be a huge amount you can do (whatever you do, don’t put egg cartons on your walls, they will only make things worse!).

But if you are lucky enough to plan a new setup this is what I recommend you aim for when you’re trying to record a rock band.

Recording Room Setup

Band recording in one room

Some important things to note:

  • All the musicians (apart from the singer) are recording in the same room at the same time but the only instrument that is actually mic’ed up in the recording room is the drum kit.
  • The guitar signal is recorded via a DI box, which is then outputted to an amplifier in a separate ‘amp’ room (using a specialized reamp device). The guitar amp is mic’ed up with one or two mics and those signals are then returned to the recording system. The guitar amp signal is then fed back to the musicians via headphones.
    Guitar Signal Flow
  • The bass player is recorded via a DI box with the signal returned to the musicians headphones. The bass track usually sounds great if you have a good quality DI (like a Radial JDI) but if you need to reamp it later and/or overdub this is also an option.
  • The singer is recorded in the mixing (or other) room with their signal coming back to the musicians’ headphones. If the quality of the singer’s track is not good enough they can be overdubbed later.

Why does this setup work so well?

Generally high schools students are not going to be good enough to record to a click track and retain a good feel, and they’re also not great at overdubbing instruments one by one. So this setup allows them to play all together as they would in a normal rehearsal room, hopefully creating a great groove.

But with our multi-room setup (i.e. having an amp room) we are able to record each instrument on to isolated tracks in our DAW so if one musician makes a minor mistake you don’t have to stop the take as you would if you had the amps in the same rooms as the drum microphones. Any minor mistakes can be cut out and re-recorded (or inserted from another take) just by the musician that made the mistake, without forcing the whole band to do another take.

Having all instruments on isolated tracks (without any ‘bleed’ from the other instruments in their tracks) allows us to fix timing and pitch issues with software like Celemony Melodyne.

On a recent session the bass player had huge trouble locking in with the drums. If the band had recorded to a click track it would be easy to ‘quantize’ the bass audio to the grid but as I said before, most high school bands aren’t good enough to be able to record to click well.

But using the new version of Melodyne 4 you are easily able to generate a ‘tempo map’ of the performance (most likely using the drum kit as your timing reference) which you can then quantize the bass to, making the two musicians perfectly in time with each other (even though they didn’t record to a click). I’ll do a full review of this software and walk through this process in a future blog.

If you want hands on, practical help with understanding how to create a recording setup like this I’m running workshops for teachers – Learning Ideas Teacher Training.

What is your physical recording setup in your school?  Comment below and share what works for you.

Thanks, Duncan

How to create a positive culture in a music department

Having a music department that gets great results academically and in performance is built upon the culture that is established amongst the students and staff.  It is something I constantly struggle with, trying to get it right for all our (25!) music groups.

The title of this blog post is a bit misleading because there is no magic formula for creating a great culture.  The is no A+B+C = X+Y+Z.  Every situation is unique.  However in my reflection there are a few things that seem to be working for us at the moment.

2015 was a struggle for my department in the areas of my jazz groups and the choirs.  Things weren’t terrible, but they were not optimal.  2016 has started with all the groups and students being committed, hard working, supportive of each other – generally a great culture!

Here are a few of the things I think are contributing to this.

A positive Culture…

  • Takes time
  • Needs to be adaptable to the students you have in front of you
  • Needs to be clearly defined in actions (such as making first jazz rehearsal a blues composition class, masterclasses, creating the expectation that everyone has to improvise), not just words, posters or powerpoints!
  • Requires hard calls taking out negative influences from difficult students (but at the same time finding a place for those students in which they can excel by placing them in different groups).
  • Requires careful planning and communication so everyone knows what is coming up (and then sticking to the plan but also being flexible enough to adjust it if students progress requires it).
  • Empowering a senior leadership group of students but at the same time spreading responsibility across all members – don’t just rely on a few ‘stars’ or dominant personalities.
  • Take time to explore the background to why we do what we do (without spending too long on it) – students must know the context of everything they do and the reason for doing it.
  • When things are not going well talk to as many experienced people as you can and MAKE CHANGES! Don’t keep doing the same thing and expecting different results. If the changes don’t work, talk to more people, reflect more, and MAKE MORE CHANGES!
  • Hire talent, not a reputation – reputation counts for nothing when coming into a new environment. In fact, many adult musicians/singers/tutors are so wrapped up in their reputation that they think the students have to adapt completely to their style of doing things. This is wrong!!!! Tutors must adapt to the students as the tutors are the ones with fully developed brains (hopefully) and have maturity (not always the case, just because they’re older doesn’t mean they’re more mature!). They must make the effort to meet the students where they are at and to then gently lead them to new levels of attitude and performance.
    I have had a lot of success hiring young and inexperienced (but incredibly talented) tutors.
  • Have fun!!! Be funny. Tell jokes (even if they’re not funny, it’s the intention that counts). No one likes to be around people that are serious all the time.

Now I know a few people read this blog that run successful music departments.  Please take five minutes to reflect on what has created a great culture for your department and comment below – share the knowledge.

Thanks, Duncan

Project Based Learning in music – part 2

This year with my year 13 music students we are deciding to make a point of not focusing on assessment as being the driver of learning in class (as it should never be but is rarely the case in most NZ schools).  Therefore we are deciding to focus on projects our students can complete through the year.  Projects such as making an album, composing for student films, making music videos. You can see details of my holiday planning for this course here.

We are now nearing the end of term one, and what a busy term its been.  But what is hugely satisfying is that the majority of my class are loving the projects they’re working on and making great progress.  It should be noted that not all students in year 13 music have decided to have a project as a major focus.  They’re quite happy completing the tasks and learning as required by NCEA and that’s great. So, what has this PBL thing looked like this year?  Well, a bit like this:


We started the year spending quite a bit of time searching for inspiration and listing the interests and skill sets of the students.  I’m very big on collaboration and I want the students to help each other out as much as possible.  To keep our ideas and skills at the forefront of what we do we created an Inspiration Wall where students pin up interesting musical related images and text as well as list their outline of their project.

Students have also setup WordPress blogs where they keep a diary of what they’ve found interesting in class and on field trips. Every time we do something in class, or they do some work, they’re expected to document their progress on their blogs. You can see some of them here:

https://jamesmurraymusic.wordpress.com

https://blipblipbang.wordpress.com

https://gusellerm.wordpress.com

https://maxmusic42.wordpress.com

Reading through the blogs you can see we’ve done a few things to focus the students on the craft they need to develop to realise the art they want to produce.  These have been:

  • Guest presenter – Luke Di Somma (local conductor, producer, arranger, composer, MD, etc).  The students were very inspired by chatting to Luke and he dealt with issues such as: where he finds creativity, how he manages his ‘business’, what motivates him, what is required to ‘make it’ in the music industry, etc
  • Visit to local studios and tertiary providers – as recording and technology is a big part of the students’ projects we visited MAINZ and had a great presentation from Ivan Shevchuk.
  • Watching music production tutorials from AVID doing our own mix of the tracks shown in the video.

For the rest of the term we’ve been largely focusing on getting the first part of their projects completed.  This has involved teaching them about how to use our recording equipment and how to mix.  There has been a lot of one-on-one instruction about crafting their compositions and arrangements.  At this stage, we’re just trying to record demo’s of everything as it’s unrealistic of them to produce good quality recordings in term 1 when they have so much learning to do around music production.  It will mean a lot of recording and mixing in term 3 and 4 so we’ll see how we go…

To assist with their learning about recording and mixing we’re going to start a course in mixing through Weathervane music.  Their Instructors Toolkit looks like it could be a great syllabus to work into our music course to advance their music production skills.  I’ll do a separate blog on this once I start using it with my students.

Where to from here…

Well, we’ll need to refocus on what it means to be creative and to make great Art.  We’ve spent quite a while focusing on their craft and finishing the first aspect of their projects, so we need to redress the balance and get focusing on what they are trying to achieve with their project by the end of the year. We’ll get more industry professionals in to talk to us and will visit local producers who can demonstrate their workflow and assist with the discussion around where to find inspiration. Students need to do a stocktake of all they’ve accomplished this term and now that they know what they’re in for need to come up with specific goals that must be achieved in term 2.

We’ll also be joining with the year 13 media class to provide the music for their original short films they’re creating.  This is very exciting and as we’re well setup at St. Andrew’s College with movie composition tools and equipment I’m expecting to see some very professional looking/sounding films in the StAC Film Festival this year.

Effective teaching of composition

I was reading this really interesting blog the other day by Suzie Boss which looks at the research of the New Zealand education researcher and professor John Hattie and how his findings could influence Project Based Learning (this blog is well worth a read, follow the link).

There is a really interesting section of the blog:

But when it comes to evaluating the effectiveness of project-based learning (PBL), Hattie has me scratching my head. Part of the challenge is that he doesn’t focus specifically on PBL, and certainly not on PBL that is designed with an emphasis on high-quality teaching and learning. Problem-based learning winds up near the bottom of teaching effects (0.15). Inquiry-based teaching ranks a little higher (0.31), but still below the hinge point. Meanwhile, Piagetian programs, emphasizing challenges that cause learners to apply higher-order thinking and learn collaboratively (sounding similar, at least in spirit, to PBL) rank near the top (1.28).

What’s more, many of the essential components of PBL turn out to be highly effective. Formative assessment, critical for project success, comes in at 0.90. Feedback, another key to PBL, has an effect size of 0.73. Challenge and practice at the right level: 0.60. Valuing error and creating trust: 0.72. It’s hard to imagine a PBL classroom where those factors are not present.

When Hattie himself synthesizes what matters most for learning, he describes an effective classroom in language that is completely consistent with a PBL environment:

Visible teaching and learning occurs when there is deliberate practice aimed at attaining mastery of the goal, when there is feedback given and sought, and when there are active, passionate, and engaging people (teacher, students, peers) participating in the act of learning.

I imagine I’m probably like a lot of teachers (especially music teachers) in that every minute of every day is filled up with teaching, meetings, running co-curricular groups, developing resources, marking… (hands up if you’re one of those teachers to barely knows what the staff room looks like at lunchtime?).  The last thing I get time for is to look at educational theory, pedagogical techniques, etc.  Any PD I do is usually specifically musically related, rather than on a broader educational level.

So this is why I like summer holidays so much, it gives me time to look at blogs, read some Hattie, and reflect on my teaching practice.  Reading the above part of Suzie’s blog made me realise why I’m turning out to be such an effective teacher of musical composition.

I’m not trained in composition, I don’t like to compose myself, it isn’t something I was ever interested in doing as part of my study and I certainly don’t feel the need to inflict my deep angst on the world in a musical format.  But over the last five or so years my students have been showing a huge level of ‘value added’ with their results.  My good students who are passionate about composition produce great art, but I’m most pleased with those who maybe don’t have great background knowledge but end up showing a huge improvement.

Without intending to, I’ve employed many of the above methods quoted above, specifically:

  • A huge amount of formative assessment – when students have a composition due to hand in at the end of the term they must hand in their drafts at least three times over the preceding four weeks.
  • Feedback – every time students hand in a draft I give them written feedback via email and through annotating their scores (if applicable). I will try to follow this up with one-on-one verbal feedback but I find this is not very effective – too often students don’t take in what I say to them and repeat the same mistakes.  Written feedback provides them with the information that helps them make the most improvement in successive drafts and submissions.
  • Challenge and practice at the right level – even though I haven’t specifically intended to run a project based learning course (until 2015) I’ve kind of already been doing this with composition.  I provide the students many options for the basis of their composition (such as compose for film, compose for a special occasion, compose in response to an artwork, etc – and for each of these I provide multiple films, special occasions, artworks, etc).  What I find is that with these parameters students are able to jump into composing at the level they’re happy with.  I have some very advanced students who compose for full orchestra (one student this year composed a full two hour long musical – and it was really good!), some students are more comfortable composing for singer/songwriters while others compose electronic works with Apple Logic.  Everyone is working within their areas of interest and these then develop into strengths.
  • Valuing error and creating trust – this is very important to the creative process of composition.  And it features hugely in my feedback.  I try to find a balance between encouragement and correcting basic errors (mostly encouraging as composition is a very sensitive and emotionally ‘risky’ thing for students to do) but I always try to emphasise that they must ‘put themselves out there’ and take risks.  That is the only way great art will result.  This sums it up (thanks @ginippi for the image):
    10877618_10204176690032199_1572360879_n

The only other important thing that I do that isn’t mentioned (but there is probably a special Hattie term for it anyway) is modelling the creative process.  While I don’t compose great art, I do understand the compositional process and can model many ways of composing.  Showing students how to start is hugely important.  Giving them a toolbox based on practical demonstration works well.  Textbooks and handouts? – next to useless.

I’ve often felt that maybe I’m not doing a very good job with composition as I’m not presenting a formalised method each year that has me explaining concepts from the from of the class – i.e. chalk and talk.  But when I look at my NCEA results of my students and listen to their recordings I realise that isn’t the case.

As this is supposed to be a technology blog I’d better quickly mention how my students go about submitting their drafts for formative assessment.

  1. Students email me their Sibelius files (if their composition is a traditionally notation based composition) and provide a print out so I can annotate it (I used to do all printing or just write comments referencing bar numbers but I didn’t find this effective – plus printing takes up too much of my time).  If they are working on Logic or Studio One they can email me Dropbox links of their DAW session and bounced MP3’s.
  2. With the second to last draft submission I will ask students to do their own analysis of their composition.  They use Screenflow to ‘talk through’ their composition explaining why they have done what they’ve done.  As much as possible I encourage them to analyse within the context of the musical elements (timbre, form, texture, melody, harmony, etc).  By doing their own analysis of their composition its amazing how many things they’re able to fix up before I give them feedback.  This self-reflection is critical.
  3. I email back students comments and will annotate their scores if applicable.  This has to happen with 48 hours for effective learning to happen and to see a change in the draft that is due the following week.  Therefore I have to schedule into my timetable a period of marking each week and make sure nothing gets in the way of it.
  4. For the final submission I make sure I scan the annotated scores and keep a copy for internal and external moderation of my marking.  It’s really important students get their work back to help them improve for future years of study.

If you want to hear some of my students work, the musical I mentioned above (“Suspect”) is now available on iTunes.

suspect banner

The Seven Sharp programme from TV1 did a really interesting article that you can view by clicking here.

I know people may have suggestions for improvement around student submissions other than email & Dropbox (Moodle, Google Hangout, One Note, etc?) so please comment below if you think it can be done better.

Thanks,

Duncan 🙂

10 great resources for teaching recording and mixing to high school students

In New Zealand we now have the wonderful opportunity to teach recording and mixing skills to high school students.  We have Unit Standards that allow us to assess and provide credits towards a course of work in the area of Performing Arts Technology and Music Technology.
However, these Unit Standards only tell us the ‘outcomes’, not the pathways teachers should follow to teach the students to the info and develop the skills.
For NZ teachers I’ve produced a series of resources (documents, tutorial videos, eBooks, assessment schedules, etc) that are written specifically for the NZ system (although the resources are generic enough to be of assistance to anyone wanting to learn about recording and mixing).  These can all be found at www.learningideas.co.nz.
IMG_0200
However, there are many other fantastic resources available that can help teach students about recording and mixing.
  1. Alan Parsons Art and Science of Sound.  This is a fantastic DVD series and covers all the basics of recording instruments and provides great background theory on the developing of recording technology.  The chapters on mixing are very weak though but the videos on recording are gold.  A new accompanying book has also just been released and is available at Amazon.
  2. Mixing Secrets For the Small Studio by Mike Senior – while this might be a hard read for students I’ve not come across anything that explains the concepts of mixing as well as this.  It’s all too easy to use presets on plugins thinking that they will provide you with a good mix (FYI, presets are never the answer!).  This book goes way beyond that showing you how to approach the mix for each song along with the specifics of the techniques for using EQ, Compression, etc.  I’ve bought this book twice as well as on Kindle I love it so much!
  3. Shakingthrough.com – This is an amazing website for a recording studio (Weathervane Records) that records artists but also documents the process from a technical/recording viewpoint as well as a creative/compositional viewpoint.  All tracks of songs featured in the videos are available for download so you can practise your mixing chops.
    They have just released a new educational course in mixing.  I’ll be using this with my students in 2015 so I’ll write blogs about how well it works.
  4. How To Listen app from Harmon – a great tool for teaching students to associate frequency boosts and cuts on EQ with Hz numbers.  This app helps to train their ears to listen critically to frequency ranges and to learn to associate descriptions with those ranges.  Also worthy of a mention is the “hearEQ” app for iOS available on the app store.
  5. hearEQ for iOS from the app store – another brilliant ear training tool – especially it’s ‘learn’ feature which allows you to boost and cut various frequencies of any song in your iTunes library.  Also worthy of a mention is “Quiztones” also available from the App store.
  6. Recording Secrets for the Small Studio by Mike Senior – probably a better book for advanced students who already understand the basics of recording techniques.  This book is excellent at giving tips for recording in less than ideal environments (which most schools are stuck with as very few schools can afford purpose built studios with excellent acoustics).  What is also really great about this book though is the advice that Mike gives with regards to working with performers and how to get the best out of them.  Overall, full of wise advice from one of the best people in the business.
  7. Soundonsound.com – this website (and associated magazine) is the best recording/mixing magazine out there.  It’s the best way of staying up to date with the latest releases in music technology equipment.  Articles are well written and full of practical advice.
  8. Pensados Place – Definitely for more advanced students and teachers… this fascinating production from Dave Pensado, one of the top mixing engineers in the music industry, regularly interviews the top mixing engineers, performers and producers.  The insights into the creative process from people who are at the top of their game and the best in the LA, NYC and Nashville music scenes is really fascinating.  Also great is the “Into the Lair” segment where Dave provides really clever (and often advanced) mixing techniques.
  9. Groove3.com – this website provides excellent video tutorials for all the major DAW’s.  You can pretty much learn everything you need to know for any DAW (like Pro Tools, Studio One, Logic, etc) by watching these 2-3 hour tutorials.  Add in another 3-4 hours of working on what is shown in the videos and inside a day you can get up and running with any DAW.
  10. Live Audio Basics DVD from Down2Earth – this can be pretty painful to watch (I wonder if Americans find it as painful to watch as my students and I do? – could be a cultural thing?) but the content and clarity with which live PA systems are explained is the best I’ve seen.  Yes, the focus is on live PA (and this is supposed to be a blog about recording and mixing resources) but their explanation on signal flow, maintaining Unity Gain, Aux/buss sends,etc are brilliant and all vitally important to recording systems as well.
IMG_0108
I have other resources I use as well, but these are my top ten (of course aside from the resources I’ve written available at http://www.learningideas.co.nz).  Go ahead and list your favourites in the comments section.  I know there are a lot of great websites out there so feel free to list them.
Happy new year!  May your 2015 be full of creative goodness!